# Part 4-Syncfusion Server Configure the Dashboard Server
## Login
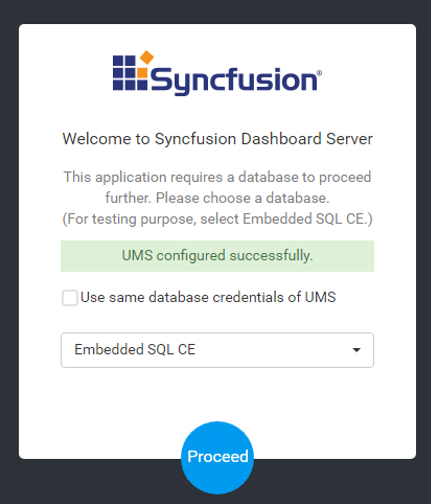
1. Tick the box that says, **“Use same database credentials of UMS”**
2. Select **Existing Database**
3. Click **Proceed**
## Configure Storage Options
You should now be prompted to configure the storage options for the Syncfusion Dashboard Server.
1. Select **File storage**
2. Click **Proceed**
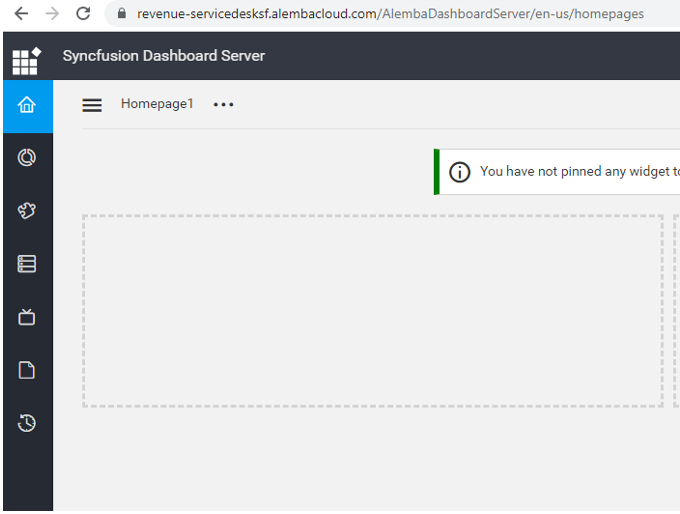
3. You are returned to the login screen
4. Please use the login and password, defined earlier in this document, and log in to the Dashboard Server. If configured correctly, your screen should have a menu on the left and a plus menu on the top right of the screen.
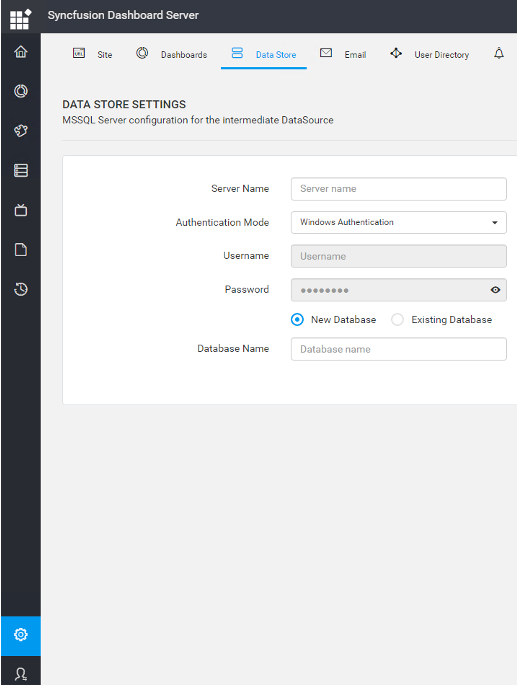
## Configure the Data Store
Configuring the Data Store needs to be done prior to starting to import Data Sources.
1. Click the the settings wheel, in the bottom left corner of the screen and then select the Data Store tab, as per below:
{% hint style="info" %}
**For Alemba Cloud customers**, use the connection details found in 1Password, for the Server Name and Username and Password.
**For On-premises/Non Alemba Cloud**, use details provided by your organization.
{% endhint %}
2. Select **Existing Database, if one has already been created** (blank DB)
OR
2. Select **New Database** and give it a name, if there is not already a DB.
3. Select **Save** on the right hand side of the screen
##