Building Screens in ASM Designer
You can create details windows, Nano Screens, and portal review screens using ASM Designer.
Details windows are used to create entities in ASM Core, such as Calls, Knowledge articles, Bulletin Board entries, Tasks, Requests and so on. Nano Screens are used in ASN Nano and Portal review screens are used to display the details of entities created in the main application on the Self Service Portal.
Before you start
You must have Designer selected in your General Access Security Role.
You should understand the concepts of screen sets and you must have created the empty screen set entity in System Administration first.
Multiple screen sets must be enabled in the IPK or Workflow Management settings if you are using custom screen sets.
If you wish to use custom screens, custom screen sets must have been defined in IPK and Workflow administration.
To maintain an audit trail of changes made to screens, forms and message templates, Designer must be selected in the Auditing window.
Display the ASM Designer window if it is not already visible on screen.
Select ≡ > Admin > Designer.
This window consists of three tabs that display different views:
Find a ScreenCan be used to search for and work with specific screens, forms or message templates, as well as create new in-house screensView screens
Displays details of currently selected screens and is used to modify screens
Skins
Enables you to create and modify skins for your Self Service Portal(s)
Select a screen type from the Screens list in the left pane to populate the browse table and activate the buttons at the bottom of the window.
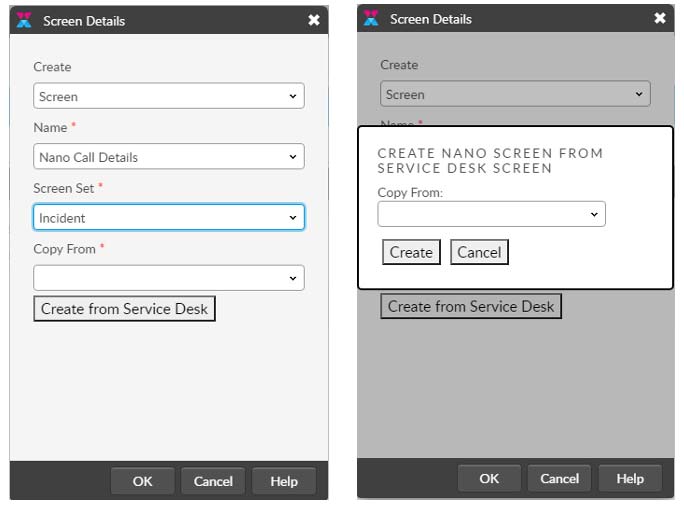
Select the Create button at the bottom of the window. The Screen Details window appears, with some of the details completed based on your Screen selection.
Complete the details:
Create
A drop-down list of different entities you can create. Select Screen if necessary.
Name
A drop-down list of system defined names. Screen names for details windows follow the naming convention “[Entity] Details”, for example “Call Details”. The name you selected should be displayed. Select from the drop-down list if necessary.
Screen Set
The screen set to which the new screen must be associated. You cannot select a screen set which already has an active screen for the name you chose.
If you choose Call Details, no screen sets are available if no custom call screen sets have been defined. However, if you choose Call Submission, the Incident, Known Error, Major Incident, Problem, and Service Desk screen sets will all be available, as these do not have a default submission form associated with them; in this case you cannot select the default screen set, Call, as it already contains a default submission form.
If you selected Knowledge as the entity, this list displays the visible Knowledge Base types. If you selected CMDB Item, it displays the CMDB Item sub-types.
Copy From
Select an existing screen on which to base your new one. The list displays the names of all existing active screens with the name you selected at Name. The naming convention for the screens in this list is “[screen set name] [screen name]"
Select OK to create the new screen. You are returned to the main Find a Screen view of the ASM Designer window. An entry for the new screen appears in the browse table.
If you try to create a screen and an inactive (deleted) screen already exists with the same name, you will receive a warning message asking you if you want to permanently remove the deleted screen from the database and create the new screen. Select Yes to continue, or No to cancel the screen creation. You can restore deleted screens if you wish.
You should test the new screen before live release to ensure there are no unexpected results.
Give Analysts access to the new screen through their IPK or Workflow security role if necessary.
If you created a Portal Submission/Review Screen, it will only be available once associated to the corresponding template.
Cloning Core Screens to Nano
This capability is available from GAIA (ASM Version 10.4) and later releases.
System Administrators have the ability to copy a Core Screen in the Screen Designer when creating new Nano Screens. This copies the Screen Field Layout and the Rules.