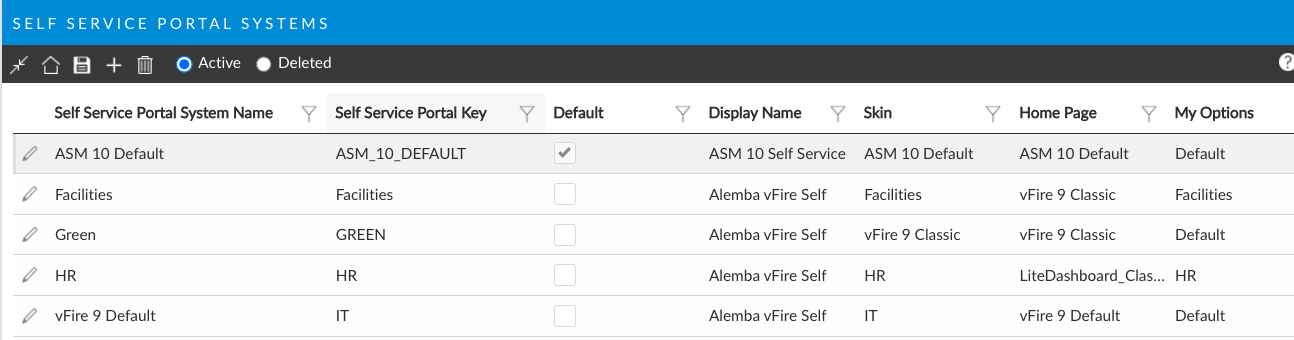
| Self Service Portal System Name | Type the name of the new system |
| Self Service Portal Key | Enter a unique identifier needed in the URL to access the new Self Service Portal. If you specify Self Service Portal Key as SALES, the URL to access this Portal would be: https://your system URL/Portal.aspx?&PORTAL=SALES |
| Default | Select to use this as the default Self Service portal system Users will not need to specify Self Service Portal type the URL if they are logging in to the default Portal (https://your system URL/Portal.aspx). |
| Display Name | Type the web page title to display in browser tabs and when added to Favorites. Leave blank to use the default web page title "Alemba® Self Service Portal". |
| Skin | Select the Skin to use for this system. If you have permission to access to the ASM Designer through your security role, you can change the look and feel of each Self Service portal system by creating personalized Skins. |
| Home Page | Select the style of home page, either ASM 10 Default, vFire 9 Default, or the Version 9 Classic Style. |
| My Options | Select a menu pane configuration (My Options) for this system. Multiple menu panes can be created and configured in Self Service Portal My Options in System Admin. |
| Portal Tables | Select the set of portal tables that you want to use to decide the columns that are displayed and the order in which they are shown. |
 {% endhint %}
1. Select ≡ > **Admin** > **System Administration**. The System Administration window appears.
2. In the Explorer pane, expand **Self Service Portal**.
3. Select **Self Service Portal Systems** to display a browse table of existing systems. You can adjust the column widths if required.
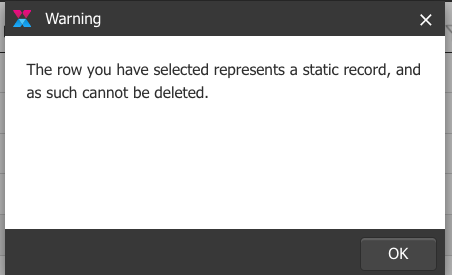
4. Select the system you wish to delete. Select the **Delete** icon. If you attempt to delete the system default, you will receive a warning message.
5. Select **Yes** to continue or **No** to cancel.
6. The deleted Portal System disappears from view, but it is not yet deleted from the system.
7. Select the **Save** icon to save the changes. Provide the Change Reasons if prompted to do so.
8. If necessary, you can reverse the delete using the [undelete](#undeleti) option.
## Restoring a Self Service Portal system
1. Select ≡ > **Admin** > **System Administration**. The System Administration window appears.
2. In the Explorer pane, expand **Self Service Portal**.
3. Select **Self Service Portal Systems** to open the window.
4. Select the Deleted option to display deleted Self Service Portal systems.
5. Select the system from the list.
6. Select the **Undelete** Icon. The portal system disappears from view.
7. Select the **Save** icon to save the changes. Provide the Change Reasons if prompted to do so.
8. The **Active** option is automatically selected and you can see that the portal system has been recovered.
---
# Agent Instructions: Querying This Documentation
If you need additional information that is not directly available in this page, you can query the documentation dynamically by asking a question.
Perform an HTTP GET request on the current page URL with the `ask` query parameter:
```
GET https://docs.alemba.com/asm-hermes/setup-and-configure-asm/configuring-your-system/system-administration-settings/self-service-portal/self-service-portal-systems.md?ask=
{% endhint %}
1. Select ≡ > **Admin** > **System Administration**. The System Administration window appears.
2. In the Explorer pane, expand **Self Service Portal**.
3. Select **Self Service Portal Systems** to display a browse table of existing systems. You can adjust the column widths if required.
4. Select the system you wish to delete. Select the **Delete** icon. If you attempt to delete the system default, you will receive a warning message.
5. Select **Yes** to continue or **No** to cancel.
6. The deleted Portal System disappears from view, but it is not yet deleted from the system.
7. Select the **Save** icon to save the changes. Provide the Change Reasons if prompted to do so.
8. If necessary, you can reverse the delete using the [undelete](#undeleti) option.
## Restoring a Self Service Portal system
1. Select ≡ > **Admin** > **System Administration**. The System Administration window appears.
2. In the Explorer pane, expand **Self Service Portal**.
3. Select **Self Service Portal Systems** to open the window.
4. Select the Deleted option to display deleted Self Service Portal systems.
5. Select the system from the list.
6. Select the **Undelete** Icon. The portal system disappears from view.
7. Select the **Save** icon to save the changes. Provide the Change Reasons if prompted to do so.
8. The **Active** option is automatically selected and you can see that the portal system has been recovered.
---
# Agent Instructions: Querying This Documentation
If you need additional information that is not directly available in this page, you can query the documentation dynamically by asking a question.
Perform an HTTP GET request on the current page URL with the `ask` query parameter:
```
GET https://docs.alemba.com/asm-hermes/setup-and-configure-asm/configuring-your-system/system-administration-settings/self-service-portal/self-service-portal-systems.md?ask=