Nano Application
This topic provides an overview for using Nano, including:
Logging into Nano
About the Nano Page Header
Using the Menu
Working with Calls
Working with Requests
Working with Tasks
Working with Bulletins
Working with Views (Calls, Tasks, Requests, Workload and Resource Manager)
Logging into Nano
You must have Analyst selected in your Person Record.
Analysts can log into Nano using the Nano URL.
Nano URL format http://<server_name>/<virtual_directory>/Nano.aspx
Replace <server_name> with your ASM web server, <virtual_directory> with your ASM virtual directory; and, if your ASM System uses SSL, replace http with https.
For example:
http://localhost/ASM/Nano.aspx
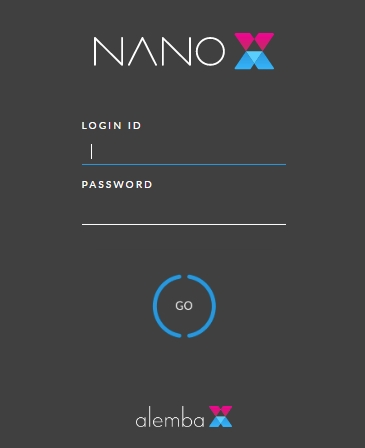
The Nano login window appears. Enter the Login ID and Password configured in the analyst's Person Details.
If Integrated Security is enabled in System Administration, or if SSO is enabled in Integration settings, the login window does not appear and the analyst is logged in automatically.
Logging into Nano consumes concurrent and named licenses in the same way as ASM Core. An analyst who logs into Nano while logged into ASM Core will be logged out of Core, and vice versa.
Session timeout periods in Nano are the same as for ASM Core.
About the Nano Page Home Page
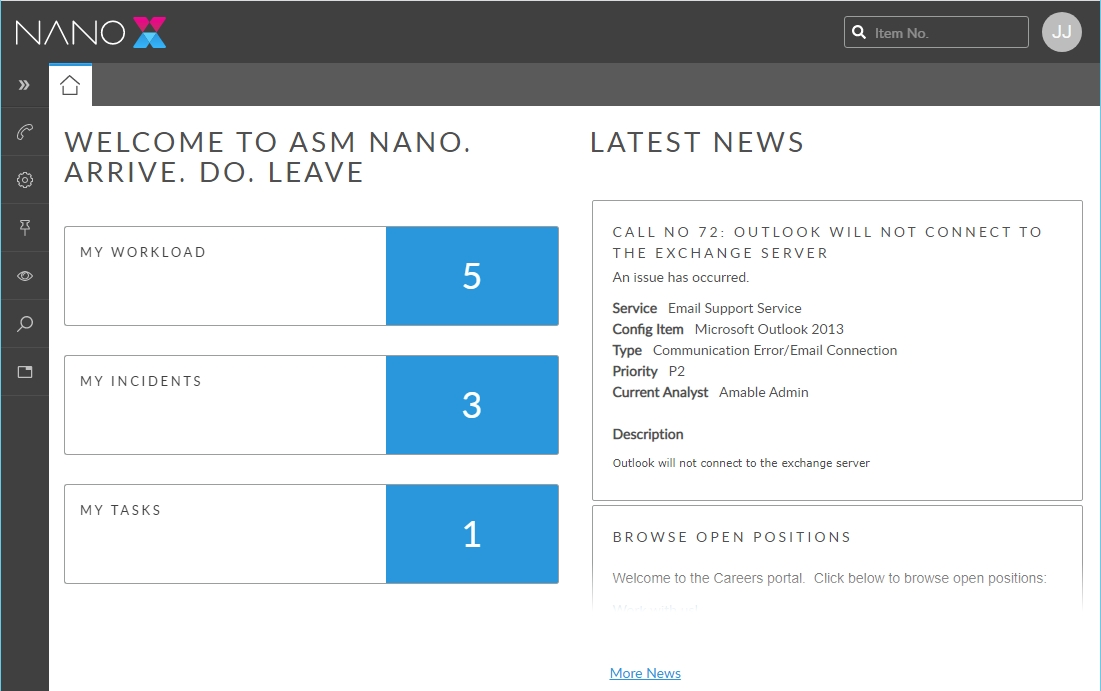
Quick Search
Find a call, request, or task by entering its number into the input field and pressing Enter. If only one item matches the entered number, that item is opened for review. If more than one item matches, a list to choose from appears.
Menu
A menu of the functions available to the analyst in Nano. The functions displayed in the menu are dependent on the Security Roles assigned to the logged in analyst, and limited to the functions available in Nano.
Home Page
Select to return to the Home page. The Home page contains a scrolling bulletin board, and the My Counts widget which shows the number of calls, tasks, requests the analyst has, as well as the workload total which combines all three.
Using the Menu
New Call
Select the type of call to create then complete the call details.
The submenu displays the available call types, or IPK Statuses and Streams, if enabled.
New Request
Select the type of request to create then complete the request details.
The submenu displays the available workflow templates; there may be multiple tiers.
Bulletin
Select a mode for viewing bulletin articles from the submenu:
Bulletin Board contains all active bulletins
Bulletin View displays a banner at the top of the screen which scrolls through active bulletins.
View
View work items requiring your attention. Select a type of work item, or see all in the Workload.
Calls Outstanding displays calls requiring your attention
Requests Outstanding displays requests requiring your attention
Tasks Outstanding displays tasks requiring your attention
Workload Outstanding displays calls requests and tasks requiring your attention
Search
Select the entity to search for from the submenu
Call Search provides options to search for calls
Request Search provides options to search for requests
Task Search provides options to search for tasks
Knowledge Search provides options to search for knowledge articles
CMDB Search provides options to search for CMDB Items, such as Services, etc.
People Search provides options to search for analysts, users, and external contacts
Standard Capability Across All Entities
Log a new call/request, or bulletin
On the menu select New [entity]
Complete the Details
Press Save.
Search
Method 1: Call Search
On the menu select Search, then [Entity]
Complete the Search fields.
Method 2: Calls, Tasks Outstanding And Workload Outstanding,Outstanding
On the menu select View, then [Entity] Outstanding
Adjust the filters if needed.
Method 3: Quick Search
Type the reference number into the Quick Search field.
A list of matching records is displayed
View details
Method 1: Quick Search
Type the reference number into Quick Search
Select the ticket from the listed results.
The Details window is displayed.
Method 2: Search or Workload Outstanding
Search the table of results for the item you want to view
Open the item using any of these methods:
Double-click on the record; or
Right-click the record and select the Select Icon
The Details window is displayed.
The window opens in edit mode or in review mode, depending on the method used to open the call, and the settings configured in your IPK Security Role.
Update
Select and open the item you want to update
The Details window is displayed
If the item is in review mode, press Take Action.
Update the Details fields
Press Save.
Assign a ticket
Method 1: Details
Select and open the item you want to assign
The CDetails window is displayed
In the Assigned To field select the analyst or group you want to assign to
Press Save.
Method 2: Search or Workload Outstanding
Search the table of results for the item you want to assign
Forward the item using any of these methods:
Select the record and select the Forward arrow in the toolbar; or
Right-click the record and select the Forward Icon
The Forward window is displayed
Complete the Forward details
Press OK.
Close a Ticket
Method 1: Details
Select and open the item you want to close
The Details window is displayed
Change the Status field to a closure status
The selected status must have the Close setting enabled in System Admin Call /Request Status Titles.
Press Save.
Method 2: Search or Workload Outstanding
Search the table of results for the item you want to close
Close the using any of these methods:
Select the record and select the Close icon in the toolbar; or
Right-click the record and select the Close icon
The Close window is displayed
Complete the Close details
Press OK.
Method 3: Kanban in Search or Call and Task Workload
In the Kanban, find the item you want to close
Drag the it to a column with a closure status
The Call Close window is displayed
Complete the Call Close details
Press OK.
About the SLA clock
The actions listed below affect the Service Level Agreements on the call. Once an agreement is attached to a work item, it begins running against a ‘clock’. ASM continually monitors the amount of time the agreement has been in effect and checks if any events are scheduled to occur. An agreement may trigger a number of events such as escalations and finally a breach.
You can stop the clock and restart the clock if you have sufficient permissions. While the clock is stopped, no time will accumulate on the agreement and no escalation or agreement breach events will occur. This may be required, for instance, if you are waiting on further information from a user and cannot proceed until you get this information.
You can Resume Service if you have sufficient permissions, to immediately close all events on all agreements on the work item. This is useful if the immediate issue has been resolved, but you wish to keep the work item open.
Agreement events are closed when the work item is closed.
Stop the clock
Select and open the call for which you want to stop the clock
The Call Details window is displayed
Change the Status field to a status that pauses the clock
The selected status must have the Stop Clock setting enabled in System Admin Call Status Titles.
Press Save.
Start the clock
Select and open the call for which you want to start the clock
The Call Details window is displayed
Change the Status field to a status that does not pause the clock and does not resume service
The selected status must not have the Stop Clock setting or the Resume Service setting enabled in System Admin Call Status Titles.
Press Save.
Resume Service
Select and open the call for which you want to resume service
The Call Details window is displayed
Change the Status field to a status that resumes service
The selected status must have the Resume Service setting enabled in System Admin Call Status Titles.
Press Save.
Working with Calls
Nano provides a range of methods for working with calls to suit different working styles. Calls can be closed or assigned to another analyst or group from the Search and Outstanding windows as well as from the Call Details window. While other actions, such as updating can only be done from the Call Details window,
For detailed information, see these topics:
Using the Call Details window - Explains how to open and update calls, the call details fields and their purpose, and how to use the Status field to perform actions on the call.
Viewing Your Outstanding Calls - The Outstanding window displays calls requiring your attention. This topic shows you how to adjust the filters and perform actions on calls from the table of results.
Searching for Calls - Learn how to search for calls and perform actions on them from the table of results.
Working with Requests
Nano provides a range of methods for working with requests to suit different working styles. Requests can be closed or assigned to another analyst or group from the Search and Outstanding windows as well as from the Request Details window. While other actions, such as updating, authorizing, or rejecting requests can only be done from the Request Details window,
For detailed information, see these topics:
Using the Request Details Window - Explains how to open and update requests, the request details fields and their purpose, and how to use the Status field to perform actions on the request.
Viewing your Outstanding Requests - The Outstanding window displays requests requiring your attention. This topic shows you how to adjust the filters and perform actions on requests from the table of results.
Searching for Requests - Learn how to search for requests and perform actions on them from the table of results.
Working with Tasks
Nano provides a range of methods for working with tasks to suit different working styles. Tasks can be closed, approved, rejected, or assigned to another analyst or group from the Search and Outstanding windows as well as from the Task Details window. While other actions, such as updating can only be done from the Task Details window,
For detailed information, see these topics:
Using the Task Details Window - Explains how to open and update tasks, the task details fields and their purpose, and how to use the Status field to perform actions on the task.
Viewing Your Outstanding Tasks - The Outstanding window displays tasks requiring your attention. This topic shows you how to adjust the filters and perform actions on tasks from the table of results.
Searching for Tasks - Learn how to search for tasks and perform actions on them from the table of results.
Was this helpful?

