
Creating a Messaging Task
Messaging Tasks are tasks which can be used to notify analysts, relevant users, stakeholders and other relevant people about the progress of the current request.

Messaging Tasks enable an analyst to add recipients for sending email or pager messages at key points within a workflow process, and can be implemented automatically if required. They can be used anywhere in the workflow and are an excellent method for keeping users, analysts and key stakeholders informed of decisions and workflow progress.
Without this task, messaging from Tasks and Approvals is limited to notifying the task owner on activation, and notifying analysts when the active task is forwarded internally.
Best Practice
Consider carefully how many messaging tasks you will send and avoid "spamming" your recipients. Too many emails can have the unintended consequence of the recipients not reading them.
The Messaging Task allows you to do the following:
Send messages to the request creator, officers, groups, external suppliers, request managers, request customers, stakeholders, stakeholders by CMDB profile, and other people associated with the request.
Select a specific messaging template for each recipient grouping.
Select multiple recipients for the messaging task.
Either automate the sending of the messages once the task is activated, or configure it to be manually updated and completed.
Messaging tasks can be customized with content specific to workflow branches, allowing you to include only relevant information.
For Example: Two Messaging Tasks branch from a single approval. One is on the approval path, the other on the rejection path.
The same recipients are defined for both but different templates have been defined. If it follows the approval path, the Messaging Task will send an email or message confirming that the decision has been approved; if it follows the rejection path, the Messaging Task will send an email or message advising that the decision has been rejected.
Different sets of recipients can receive different messages depending on which message template they have been linked to. Message recipients can even be defined within a workflow template, further streamlining the creation of change requests.
Creating a Messaging Task - Automated or Manual
Messaging tasks are automated by default, and run at a designated time and date without user intervention. If you want this task to be manual, deselect the Automated checkbox and assign the task.
As soon as the Messaging Task becomes active, it will send a message on closure, either as an email or as an SMS/pager message, to specified recipients. If you deselect the Automated checkbox, the analyst assigned to it opens the task and manually adds recipients and selects the message template. This allows for messages and their recipients to be added, adjusted and checked prior to being sent.
You can also Attach Request Objects to the Messaging Task.
Enable Automation by checking the "Automation" check box.
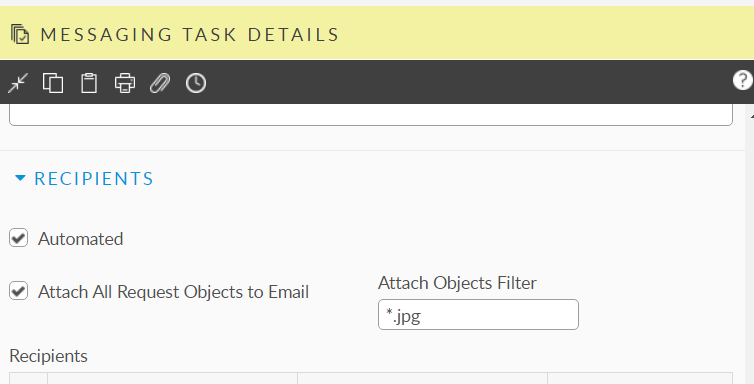
Check the Attach All Request Objects to Email option.
By enabling this setting, every request attachment will be sent in the messing task email. If you would like to filter by a file type, you can do it by defining it in the “Attach Objects Filter” field. The format must be: *.filtetype (for example: *.jpg) Only one type can be set.
Search for the Request Details window, if it is not already on screen.
Select the Update Dependencies explorer option on the Request Details window, or the button from the toolbar. The Task Dependencies window appears with icons for task entity types displayed below the toolbar.
On the dependency diagram, double-click the Messaging task icon to view the Messaging Task Details window.
Complete the common task fields. The details entered in the Description field are sent as part of the email.
Expand the Recipients section on this window.
To add a recipient for notification, click Add Recipient.
In the pop-up window, select the required recipient(s):
People
Select to send emails to specific people. You can refine your selection to users, analysts or external contacts by selecting/deselecting the options. Then type a name into the Name field and then click Find. Choose from the results browse table and select Add. Repeat to add as many people as required. (You can use ctrl/click to select several entries from the same search results if you wish.)
Group
Select to send emails to a Workflow Group (including all members of the group). Search using the Name field and click Find. From the browse table, select each group you want to receive the email and click Add.
Other
Select to send emails to a recipient specified in the chosen field when the task becomes active. A list of fields appears, including fields added through ASM Designer. After selecting the fields, click Add.
To send a message to the Request Manager select Request No/Request Manager or to select the user linked to the request, select Request No/User.
Stakeholders
Select to send an email to a request stakeholder as the recipient. A list of stakeholder roles appears. choose how many levels of available Stakeholders to display in the selection list.
The list of Stakeholders on the Messaging task has new recipients available related to Linked CIs. Notifications can be sent to the stakeholders of CIs linked to the CIs Attached to the current Request. This affects CIs linked up to 2 levels from the current CI. The linked higher/lower options relate to the CI relationship mapping.
Request CIs/Linked CIs – Higher/Stakeholder
Request CIs/Linked CIs – Lower/Stakeholder
CI A is linked to CI B. CI A has stakeholder 1 and 3. CI B has stakeholder 2 and 4. If CI A has a change logged to it, the workflow can be configured to notify stakeholder 1, 2, 3, and 4 using the messaging task.
Select the stakeholder role(s), and click Add.
To select the stakeholder of the person who authorized the request, select Authorized By/Stakeholder.
Each time you select Add, the recipient(s) are added to the Selected Recipients table. Complete the details.
Name
This is a read-only field displaying the name of the person, group, field or role that was selected.
Select the checkbox to confirm that you wish an email to be sent to the recipient. This checkbox gives you the option to set up recipients without actually activating them.
Email Recipient Type
Use the drop-down box to indicate whether you want the email to be sent to the recipient as a primary recipient, or as a CC or BCC.
Internal
Select to have an internal message sent to the recipient
Message Template
Use the drop-down list to select a mail message template to use for sending the message to the selected recipient(s). These templates are defined by the system administrator when mapping templates to message types.
8. Click OK. The window is closed and you are returned to the Messaging Task Details window.
9. You have another chance to set the Recipients details in this window.
10. To remove an added recipient, select the recipient’s name in the Recipients table and click Delete. You can only delete one recipient at a time.
11. After you have completed the fields, save the task, or defer it for later action.
Last updated
Was this helpful?